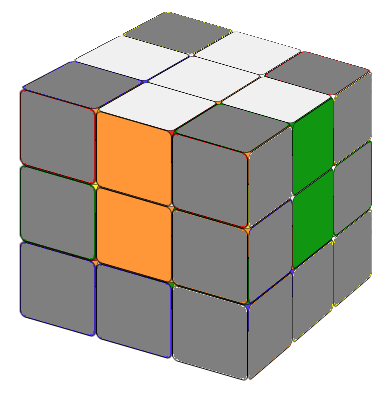
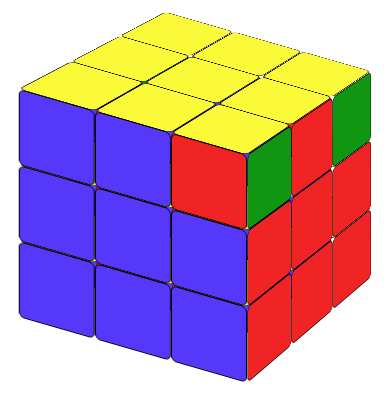
STEP1: SOLVE THE FIRST LAYER
Now let's solve a 3x3 Rubik's cube. There are many ways to do it. The method introduced here requires minimum memory work. We solve it layer by layer. That is, we solve one side first, make that side at the bottom layer, then solve the second layer, then the last layer, the top layer. Let's start by solving the first layer, typically the white layer. There are numerous methods for achieving this, but we'll outline a straightforward approach that progresses layer by layer. Follow the steps illustrated in the images below, experiment with the cube, and discover the method that suits you best. You can also practice using the virtual cube available here."

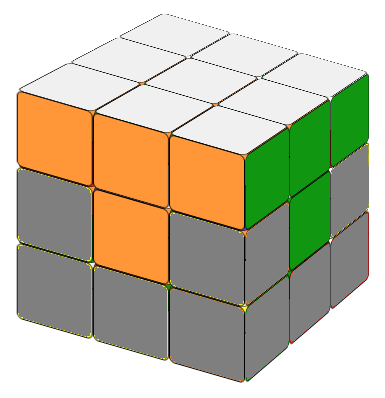
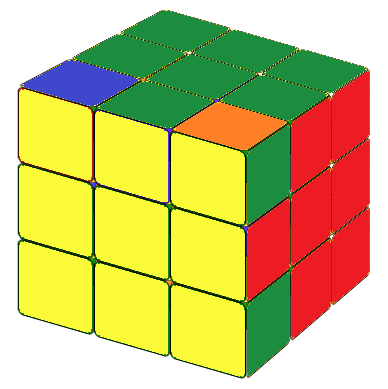
STEP2: SOLVE THE SECOND LAYER (THE EDGES)
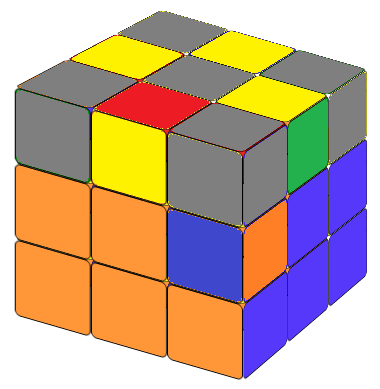
Start by turning the cube 180 degrees so the white layer, which is already solved, is at the bottom, creating an upside-down T shape (see Fig.2). Because the center pieces of the second layer are already correctly placed from the previous step, our attention should be focused on the edges. Start by identifying the correct location of the cubie that needs to be relocated. If it is located on the top layer, adjust the top layer to match either Fig.2a or Fig.2b.
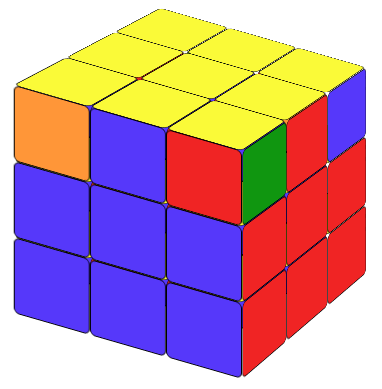
(a) Move the front-up edge cubie to the front-right edge position (Fig 2a)using formula: "To the Right":
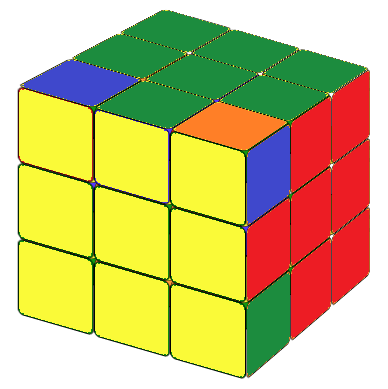
(b) Move the front-up edge cubie to the front-left edge position (Fig 2b)using formula: "To the Left":
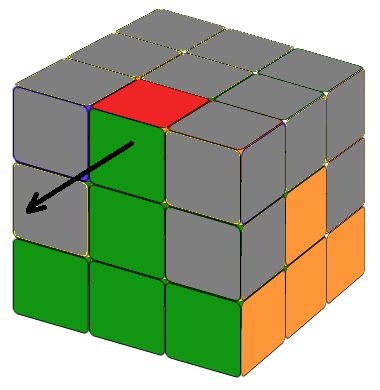
Tip: The first step of the formula always moves the cubie farther away from the postion it wants to go.
(c) The edge piece we need is on the second layer but in the wrong place or orientation.
In this case, we can put a random edge piece of the top layer to the edge on second layer
using either one of the above formulas (which will bring the edge cubie we want to the top layer), then we encounter situation (a) or (b) again.
Slove the second layer: To the Left or Right
Apply the techniques mentioned above to solve each edge, completing the second layer. Now, we confront the challenge of solving the last layer, which is understandably the most difficult. We must keep the layers we have already solved intact while we manipulate the upper layer. To simplify the process, we divide it into four steps, which are detailed below.
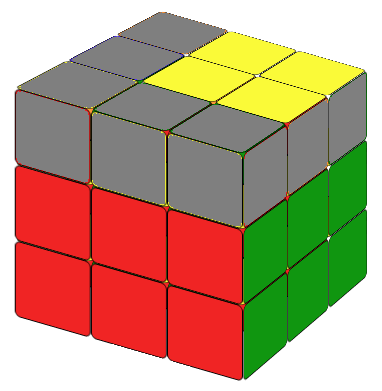
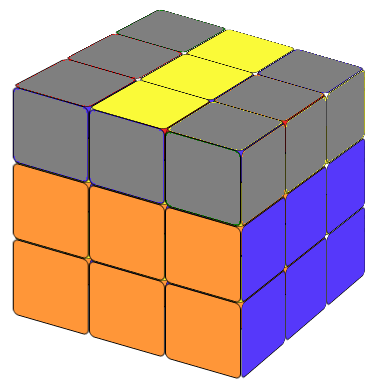
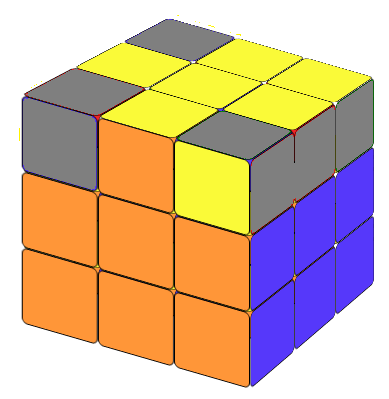
STEP3: Make a YELLOW CROSS on the up layer

To make a yellow cross on the upper layer, we use a straightforward method referred to here as the "fruit" formula which will be applied to each of the subsequent scenarios:
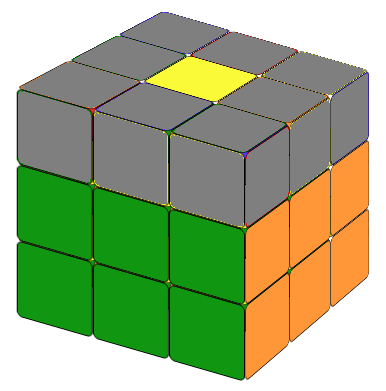
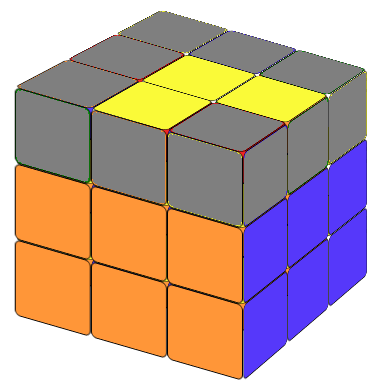
If the top layer already has a yellow line (Fig. 3d or Fig. 3e), make the line horizontal before applying the formula once (Fig. 3e). This will result in a yellow cross on the top. If the top layer has a 90-degree rotated L (Fig. 3b or Fig. 3c), we need to apply the formula twice. If the top layer only has a yellow center (Fig. 3a), which it must have, we need to use the formula three times. You can practice the formula using the provided animation here. Fruit
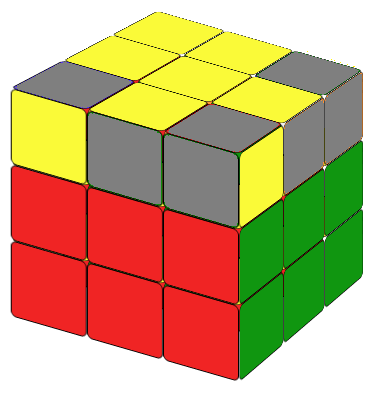
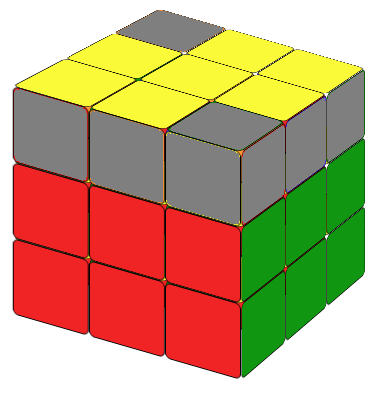
STEP4: MAKE THE UPPER LAYER ALL YELLOW
The center and the four edges of the upper layer are already in the right color (yellow) from the previous step. We now must address the four corner pieces on the upper layer.The cube will be in one of the following five situations.
When there are three non-yellow colors on the top layer (refer to Fig. 4a and Fig. 4b), we refer to this as a fish pattern.
Rotate the top layer until the fish heads are positioned in either the back-left or back-right corner,
ensuring that there is a yellow color on the back layer corresponding to each case.
This will result in one of the following two situations:
(1) The fish head is located in the back-left corner (Fig.4a). This can be solved using formula:
(2) The fish head is located the back-right corner (Fig.4b). This can be solved using formula:
Tips: In the counter-clockwise fish pattern, the yellow color on the back layer moves in a counter-clockwise direction towards the fish head.
When executing the formula, always turn the upper layer in a counter-clockwise direction.
In the clockwise fish pattern, the yellow color on the back layer moves in a clockwise direction towards the fish head.
During the formula sequence, always turn the upper layer in a clockwise direction."
In this scenario, we will continue using the two formulas mentioned earlier, but they will be applied multiple times. If there are two cubies with incorrect colors, rotate the cube so that the yellow color is at the back of the left-back corner cubie. If there are four cubies with incorrect colors, rotate the cube so that the yellow color is at the left of the left-back corner cubie. Once the cube is in the correct initial position, apply the counter-clockwise fish formula. This will result in one of the fish patterns described in (a).
Animation: Clockwise or Counter-clockwish Fish Patterns
Tip: Put the cube in the correct initial condition before applying the formulas.
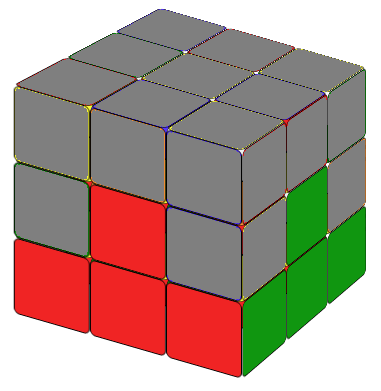
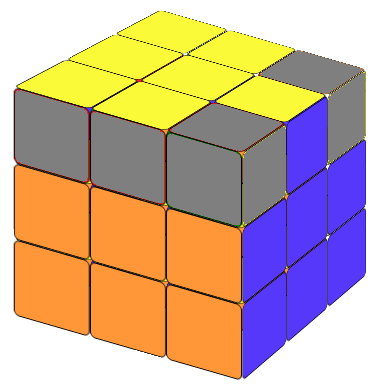
STEP5: REARRANGE THE UP LAYER'S CORNER PIECES
We encounter two cases:
(a) One side has two corner pieces with the same color on that side (refer to Fig. 5a)..
In this case, place the side with matching corner colors on the right side and make the yellow layer the front layer (facing us). Apply the formula R2D2
(b) No side has two corners with the same color (refer to Fig. 5b). In this situation, it doesn't matter which side is on the right, but ensure the yellow layer is the front layer. Apply the same R2D2 formula, then we will encounter situation (a) again.
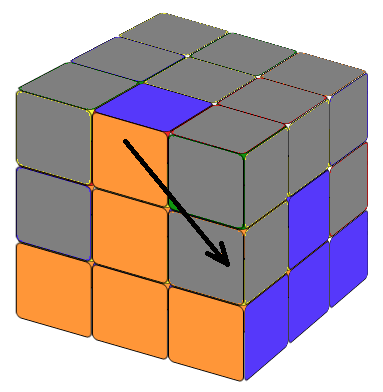
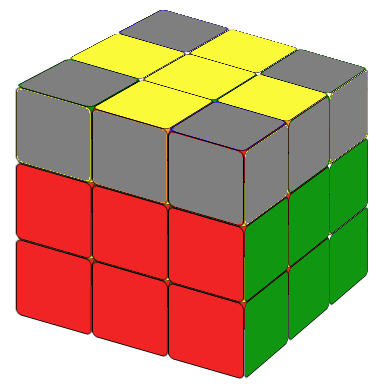
STEP6: FIX THE UP LAYER'S EDGE PIECES.
This is the final step. We're almost finished. Rotate the cube so the yellow layer is the upper layer again. It can only be in one of the following four situations.


For situation in Fig.6a and Fig.6b, one side is soloved. Position the cube so that the solved side is facing us.
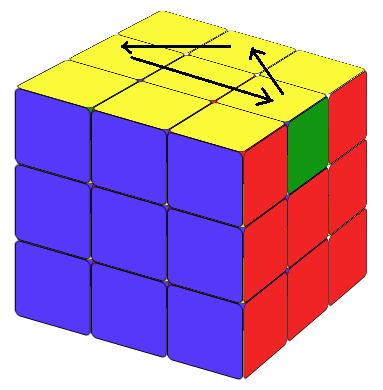
(a)The three incorrect edges can be fixed by moving them counter-clockwise (as shown in Fig. 6a)
In this case, we can solve the cube by applying the following formula sequence:
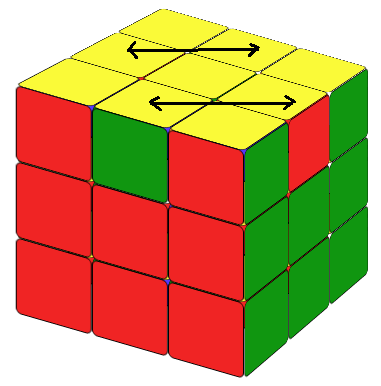
(b) The three incorrect edges that can be corrected by moving them clockwise (as shown in Fig. 6b)
In this case, we can solve the cube by applying the following Applying formula sequence:
For the other situations, all four edges are incorrect. we can use either the clockwise fish formula or the counterclockwise fish formula, then the cube will be converted into situation (a) or (b).Or
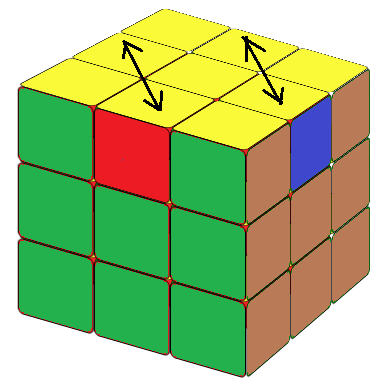
(c) In situation shown in Fig.6c, we can apply formula:
(d) In situation shown in Fig. 6d, we can apply the formula:
Now that we've mastered solving the 3x3 cube, we've grasped the fundamentals.
Building on this foundation, solving the 2x2 cube becomes straightforward.
Moreover, we can extend our skills to solve larger cubes like the 4x4 and 5x5 by
reducing them to 3x3 cubes.
Have fun!